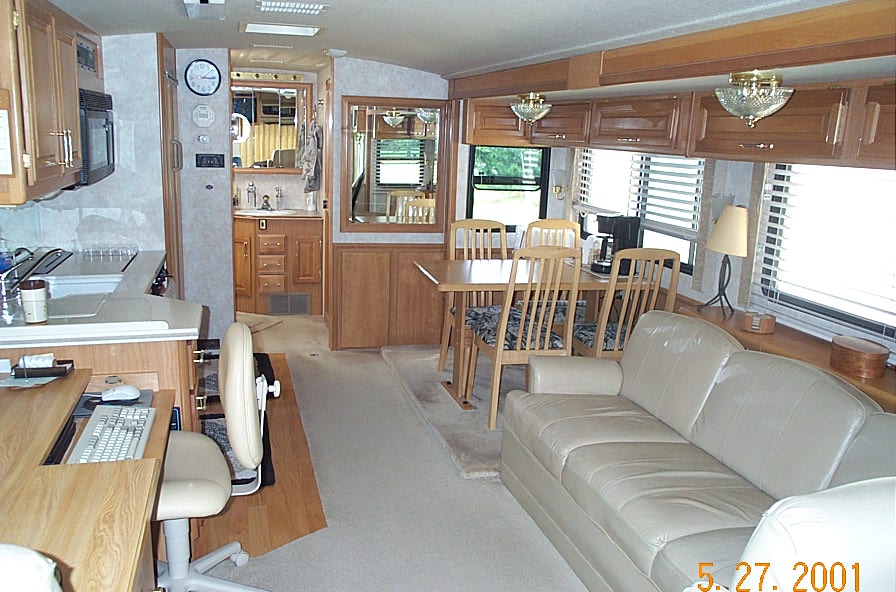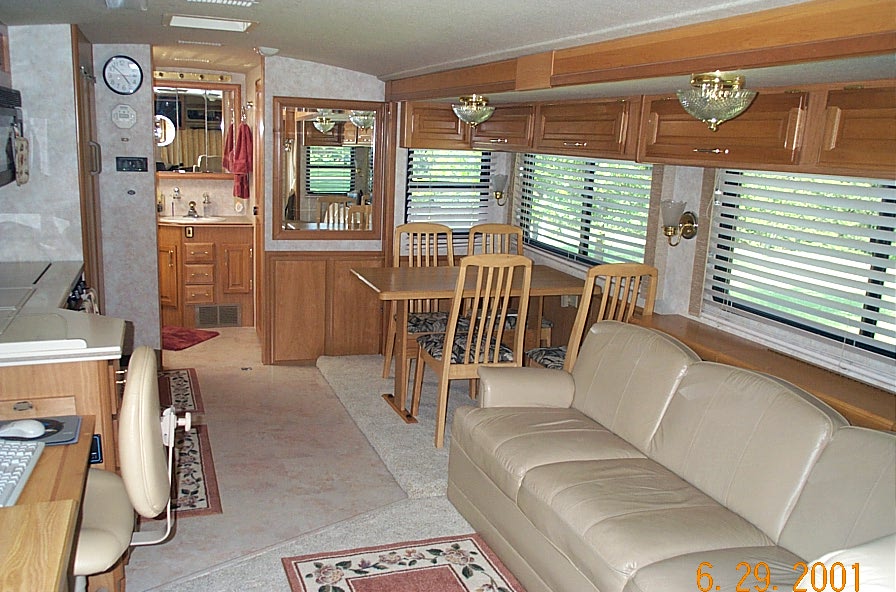

Here is carpeting and tile modfications by Art Schmitt. This has to be the nicest tile job I have ever seen. It looks like Art has a neat computer desk on the left also!
"When my wife and I toured the new D models at the Lazydays rally last February, she decided we'd keep our "old" '97 36T but she wanted new carpet and tile in the kitchen, shower and toilet areas. I installed top of the line high-traffic carpet (don't need much) and a laminated tile "floating floor." The project turned out well -- we are still married and I don't have to worry about buying a new D."
Here are the "Before" and "After" Images. Click on the image for a larger picture.


Here is some info from Art on this project:
It took a couple of weeks to do the refurb project. I replaced all the original D carpet (including trim on the dash) with new, premium, high-traffic stuff my wife, Beth, picked out. Our D is a '97 36RS (36T) which we bought used from friends. They used it to full time for 18 months and we have been full-timing for over a year. Even though friends and us have a "no shoes" rule, the carpet was still well worn in the traffic areas.
Beth never liked the carpet in the bathroom and when she saw the new D's at the Lazydays rally last Feb., she decided we "had to have tile."
After looking at the sheet floor covering, vinyl and even ceramic tile, I decided on the new laminated, floating floor tile. (They call it "floating floor" because it is not attached to the floor at all. The flooring (tiles or planks) lay on a thin foam sheet and are glued together on tongue-and-groove edges. There is a 5/16" clearance all around.) This laminated stuff is really a wood product with the finish bonded to it. Most of the products are made to look like wood plank flooring, but I found some in 15" X 15" tiles. There are many styles that look like ceramic, marble, wood parquet, etc. I've seen Pergo brand at Home Depot; however, Beth picked a product by Wilsonart. They are all about the same.
As a full-timer, the biggest issue to face when you take this on is having another place to stay. It is really a hassle to try to live in the project mess and to "clean up" every day when you finish. Aside from that, it doesn't require any skill, just patience with yourself. Wilsonart puts out an installation video. I still have it and can send to you if you decided to go forward.
My D has the Fleetwood E-Z Glide slide. I found that the original carpet goes under the slide all the way to the side wall. The slide does not actually touch the floor as it goes in and out; it rides on the blocks by the wall at fore and aft of the slide. As you plan your project you'll want to be sure your new materials don't exceed the height of the original carpet and pad, or wood planking. I did not have a problem with these issues. I cut the original carpet about an inch (as far as I could reach) under the slide by dinette then ran the tile under the slide up to the edge of the remaining carpet. Followed the same approach for carpet under slide sofa. I did not replace the original carpet under the sofa on the slide platform since it doesn't show.
Toughest part of the entire job was removing the wood plank flooring that Fleetwood installed in the area by kitchen sink and frig (see "before" photo). It was not floating floor and was glued solidly to the subfloor. You need to pry up the planks and scrape off the glue. The glue they used on mine is a permanent type, like Liquid Nail, and very difficult to get off. By the time I finished I had put many gouges in the subfloor. I used a floor leveling compound to fill the holes then put down a thin Luan plywood underlay. You can glue or nail the underlay. Then lay down the foam sheet and tape it several places to hold in place.
As you lay the tile you need to be sure the lines are square/parallel with walls, etc., and are pressed together tightly. To do this, I measured the distances, divided by tile width, and laid out the tiles "dry" to make sure everything would work out. Then I marked a center line (front-to-rear) and nailed straight board along the line all the way into the bathroom. Then laid the first row of tile along the center board. The next row can now be pushed against the first row of tile held in place by the center board. I worked from the center board to the sink cabinet. When I had laid all the full tiles in that direction, I took up the board and laid tiles toward the slide side. To be sure the first rows wouldn't slip, I put shim strips between the sink/frig cabinet and the first rows laid. The rest is just following the installation instructions for the tile. I cut the tiles with a saber saw. Use a fine cutting blade and have a good supply of them; the laminated wood is very hard. You don't have to worry too much about the straightness of the cuts since they are around the wall (or under slide) and you will want to cover the edges with a quarter-round molding. I used the cheap wood-look quarter-round from Home Depot by kitchen but bought molding to match tile in bathroom area.
I completed the tile work before I did the carpet. I simply cut out the carpet in those areas where tile replaced the carpet. When the tile work was complete, I removed the original carpet in complete pieces as much as possible. These provide a good starting place to cut the pattern from new carpet. I also removed and replaced the pad with a better one, but you don't need to do that. In fact, the biggest problem with the carpet job was removing all the staples from the floor after the pad was removed.
Use a driveway or garage floor to lay out the new carpet and old carpet pieces (pattern). You'll want to cut carpet from the underside, so remember to place the old pieces bottom side up too. Cut the new carpet 2"-3" bigger than the old so you can trim to fit. The carpet work is a snap compared to tile.
Saber saw to cut tile and underlayment; scissors to cut foam pad; stiff metal putty knife/scrapper to remove old glue; plastic putty knife to spread new glue; blue masking tape; other odds and ends per tile installation instructions.
Like most jobs this is easier with the right tools. I rented carpet installation tools (electric stapler, knee-kick stretcher, wall edge trimmer. Also bought a carpet cutting tool (a large handle that holds a special blade -- much better than standard utility knife).
The DISCOVERY OWNERS ASSOCIATION, INC, was formed to promote the sharing of information and the camaraderie of fellow Discovery motorhome owners. Membership in the club is limited to owners of Fleetwood Discovery motorhomes.