

We had several concurrent issues we resolved or set up for resolution during this exercise.
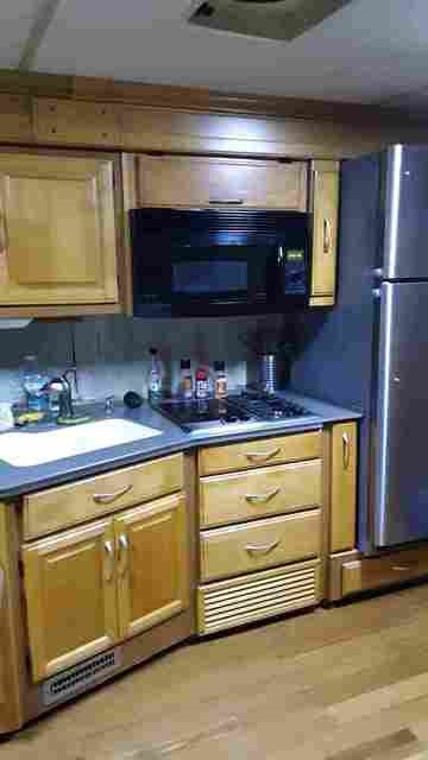
1. The microwave was 3/4 inch or so lower in the front than the back.
2. The upper cabinet left of the microwave was falling from the ceiling.
3. The NoCold was revealing its erratic operation.
I'll treat each separately.
1. Before you begin this step, be sure you have assistance to hold the microwave.
The small 'spice cabinet' above the microwave had a false back with a hole in it that was secured by a couple velcro strips. Use the hole in the false back to pull it out out and you should see the microwave's power cord at the back wall and a bunch of wasted space. The back of the microwave hangs on an aluminum box frame bracket that is secured to the back wall (see January 2019 photo below).
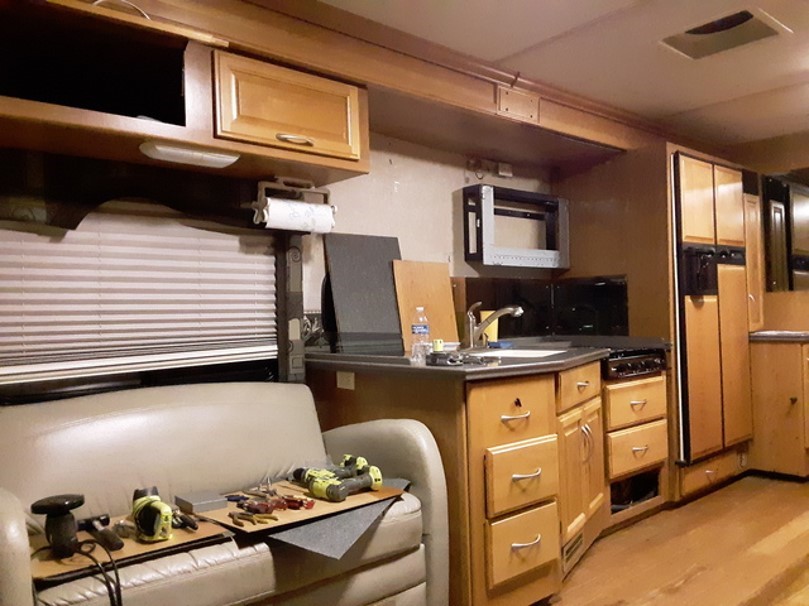
You shouldn't have to do anything with that aluminum frame -- it was welded and seemed to be mounted quite sturdily. Steel angle brackets are bolted to the ceiling that held much heavier than needed steel straps bolted poorly to the top of the microwave with two 1/4-20 bolts. Removing the two bolts from the top of the microwave allows the microwave to swing down at the front, supported by the hooked lip at the bottom rear. Once the two bolts are removed, two people (Bruce and I) easily lowered it to the floor.
2. To remove the cabinet left of the microwave, we had to remove the felt liners and several panels that screwed the unit to the next cabinet left and to the ceiling. We found where the slide's structural members were and connected to them instead of the slide's metal shear panels wherever possible. It is much more solid now. WARNING: use short screws when fastening to the slide ceiling or back walls. They are only an inch or so thick. Too-long screws can create a call for Eternabond or Dicor on the slide roof. Hmmm ...
Then we reinstalled the felt liners, using spray-on adhesive.
To reinstall the microwave, we wanted our fasteners to be in shear instead of tension.
The following sketches should give you an idea of what we did.
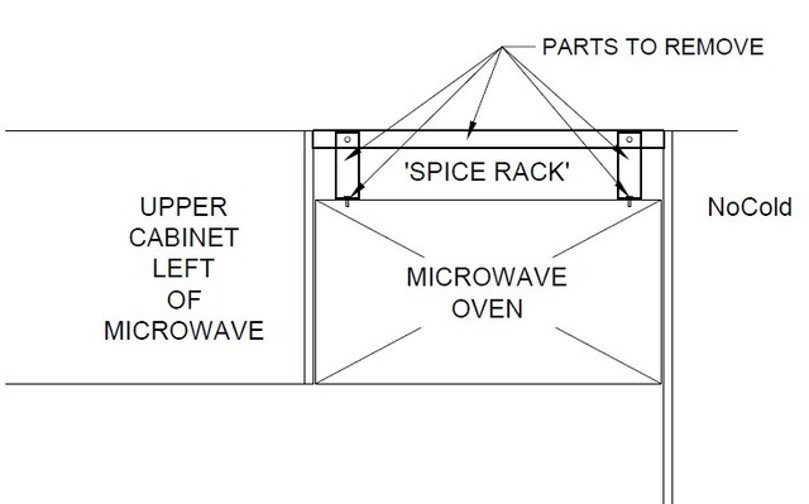
Sketch 1 - Parts to Remove
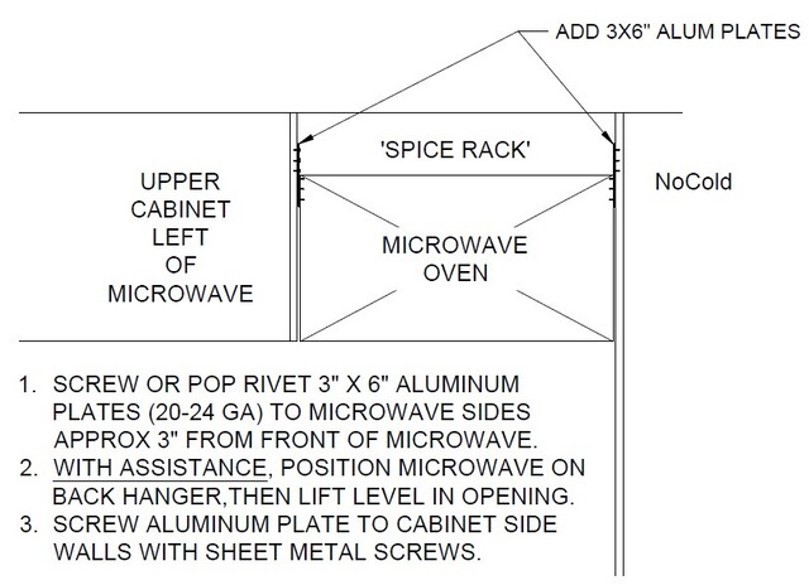
Sketch 2 - Parts to Add
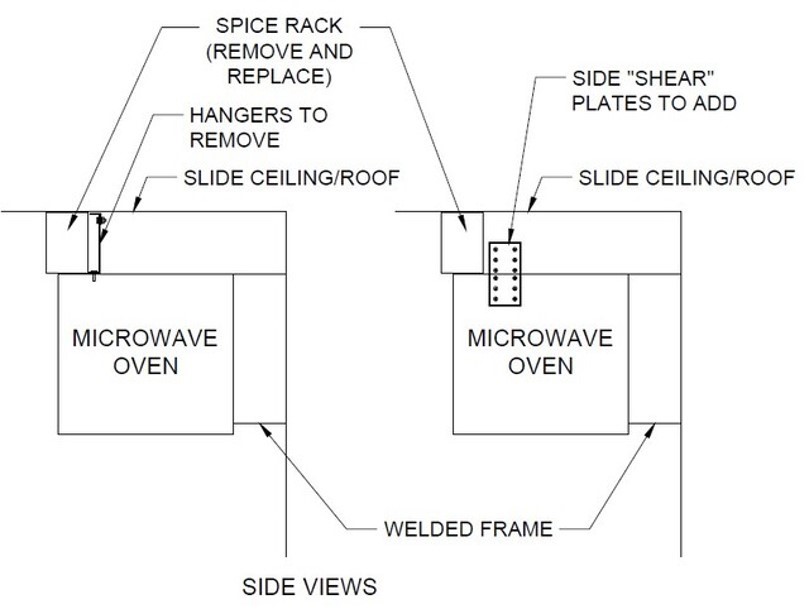
Sketch 3 - Side Views
See today's photo below of the outcome so far:
Work remaining to be done to finish kitchen:
It's a work in progress, but it's coming along.
Questions: Call Gale 509-961-3458
Gale and Linda Culbertson with Penny da Pooch
2007 39L (2006 mfg. date), Cat C7
The DISCOVERY OWNERS ASSOCIATION, INC, was formed to promote the sharing of information and the camaraderie of fellow Discovery motorhome owners. Membership in the club is limited to owners of Fleetwood Discovery motorhomes.