
After our Norcold 1200 went through it's 5th rebuilt cooling unit (2002 38D) it was time to give it the heave ho!
After much searching on the Internet I found at Lowe's a "Fisher Paykel" 17.6 cu ft bottom freezer unit with dimensions close to the Norcold dimensions. All others from Sears, Ammana, Hotpoint, etc. were to narrow and deep which would have caused limited access and large gaps on either side of the refrigerator. By removing the doors and the defunct cooling unit I was able to remove the Norcold through the entry door. I removing the pin in the door stop to allow in to open farther. The new refrigerator, sans doors, was narrow enough to fit in as well, although it took some horsepower to get it high enough to clear the dash. 3 strong neighbors was just about right.
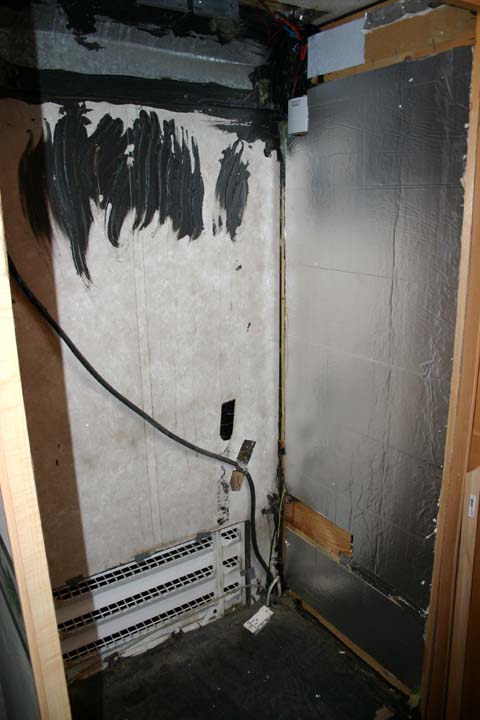
Before installation of the new unit I removed all of the existing F/G insulation and insulated the sides with foil back barrier material, R5, from Home Depot. This was placed inside of the existing framing pieces to maximize the space between the refrigerator sides and the cabinet. Cooling for the refrigerator is through the sides of the unit. I also cut and capped the gas line under the cabinet floor and moved the ice maker outlet under the cabinet floor a well. The outlet box for for the refrigerator plug was dismounted from the side and left free until after the refrigerator was installed.
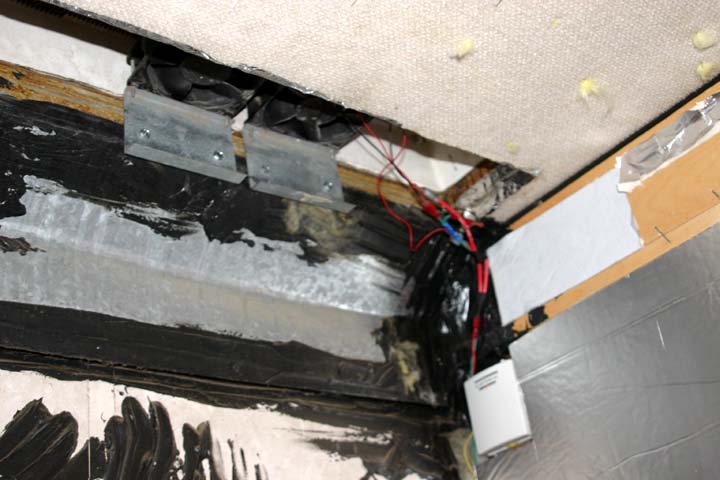
I removed the fans from the Norcold and mounted them in the opening for the refrigerator roof vent and installed a manual thermostat that I modified to come on at 90 degrees to assist in cooling the refrigerator on hot days. I also installed 5/8" spacers on the sides of the opening to reduce the gap between the refrigerator and the cabinet.
The upper edge of the refrigerator had to be raised about 2 1/2" to clear the top of the refrigerator. With the doors still removed we installed the refrigerator into the opening. Doors were reinstalled before it was slip all of the way in. Once in place the existing water tube was attached to the rear of the refrigerator. I trimmed out the sides with 1 1/8 corner trim pieces from Home Depot, finished to match the interior wood. This filled the remaining 1/8" gaps around the refrigerator to keep the heat in and cold out. Also looks very nice. After a few hours for the oil to return to the compressor I plugged it in and two hours later we were in business.
Refrigerator is costly, but not nearly as much as a new Norcold, has lots more room and the doors, while not swinging all of the way open, open plenty far for access to the refrigerator interior. Looks good to, like it should have been there all along. Did have to remove the ceiling light in the hallway and had to move the smoke detector farther aft to clear the new door. I had to raise the "cutout" for the refrigerator by 2 1/2". I also fastened the rear of the refrigerator to the cabinet floor in three places in the same manner as the Norcold was fastened in the back.

Above picture is of the modified Ace Hardware Manual Thermostat and cooling fan installation. Used old DC power wires to power the fans.

View looking at aft wall of cabinet after insulation installation and moving of ice maker receptacle and gas line below floor. Forward wall looks similar. 5/8" spacers on cabinet face sides not installed yet. I also had to reinforce the floor in the cabinet. Fleetwood used staples to assemble the floor plywood to the frame and floor joists. Added deck screw through the face into joists and dry wall screwed floor to joists for much needed additional stability.

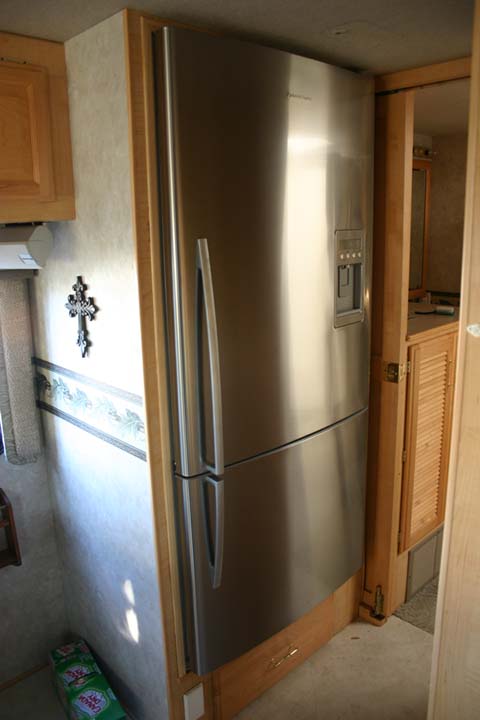
Final installation trimmed out.
The DISCOVERY OWNERS ASSOCIATION, INC, was formed to promote the sharing of information and the camaraderie of fellow Discovery motorhome owners. Membership in the club is limited to owners of Fleetwood Discovery motorhomes.