Slide Topper Replacement
We recently had to replace all three of our slide toppers. After much searching we found a company that would make exact replacements for our toppers at significantly less cost than those at Camping World, and made of Marine Sunbrella instead of regular Vinyl. Marine Sunbrella will last many years instead of the 2-3 years for the topper material installed by Fleetwood RV. The following is a comparison table for the Camping World Elite Toppers vs the Shade Pro Toppers.
| Our Coach |
Bedroom Slide |
Driver Slide |
Curb Slide |
| Actual Size |
87" |
164" |
176" |
| Camping World Elite |
| Closest Size |
84" or 90" |
162" or 168" |
174" or 180" |
| Regular Price |
$278 |
$444 |
$470 |
| Member Price |
$250 |
$400 |
$430 |
| Shade Pro Sunbrella |
| Size |
87" |
164" |
176" |
| Price |
$208 |
$219 |
$219 |
Furthermore, the Camping World Slide toppers come in White or Silver, the ShadePro toppers come in a multitude of colors to match your coach. The ShadePro representative told me they offer free shipping, complete installation instructions, and will make the topper to the exact size of your old topper. For our coach the total savings were ~$440.00. Click HERE to visit their website. 1-877-742-3342 is their phone number, and Eddie Ramirez was the representative we dealt with.
Installation for A&E slide toppers was relatively easy following Shade Pro Instructions. The steps follow: our learning's are in a separate paragraph below the instruction:
- Fully extend the slide out.
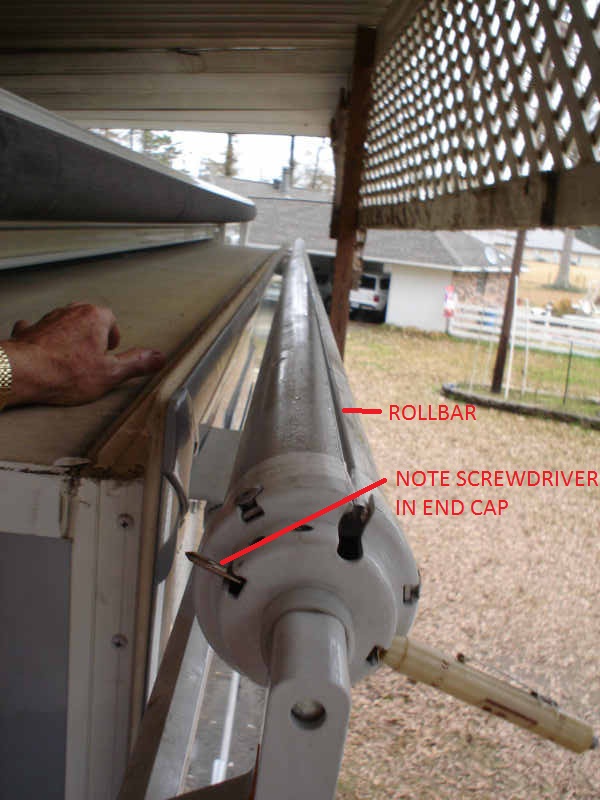
- Firmly grasp the roll bar and twist toward the coach until all the fabric is off the roll bar.
The fabric slot should be rolled until it is on the top of the roll bar. This makes new fabric installation easier. Taking the rolling in small steps, then inserting the pin will make the operation a bit easier.
- Align the holes in the roll bar end cap and the pivot bar inside the roll bar. Repeat for the other end cap.
We found that this is most easily done with 2 people, one to unroll the roll bar, and the other to insert the pin in the end cap. This is the most difficult part of the job, I don't think I could have done it alone.
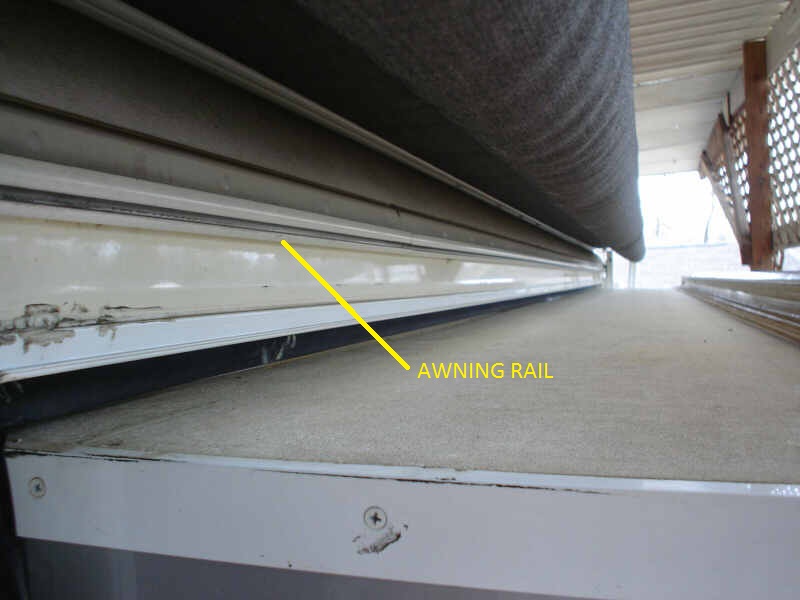
- Remove the fabric retaining screws in the awning rail. If the A&E Aluminum wrap is installed, spread open the slot holding the fabric.
- Remove the sealing tape from the roll bar that holds the fabric in place.
We found bringing the slide in about halfway makes the rest of the steps easier.
- Remove the anti billow lever if it is mounted on the end where the fabric will be removed.
- Simultaneously slide the fabric out of the roll bar and the awning rail or Aluminum wrap.
We found that slicing the fabric length wise in the middle will make removal easier. We also found wetting the slots with spray Silicon greatly improves the ability of the fabric to slide in the slots. Also it might be necessary to open the awning rail slot to 3/8 inch if there isn't an opening to slide to fabric out. Fleetwood might have installed the slide topper from the end of the coach. It is much easier to create an closer opening then close it after new fabric installation. We used a large screwdriver to open the slot on the curb rail, then closed the opening with vise grips with a wash rag between the grips and the rail.
- Clean the slots, then lightly spray Silicon into the slots to reduce friction when sliding the new fabric into the slots.
- Carefully insert the new fabric into the awning rail approximately 6-8 inches. The edge with the larger Polyrod goes into the awning rail on the coach.
We found that starting the new fabric into the slots required some effort because the double stitching and extra fabric on the edge made it difficult to get it started. I used a pair of pliers to help it along. Once started the fabric moved easily.
- Carefully insert the new fabric into the slot on the roll bar.
- Simultaneously slide the fabric into the 2 slots until it has been positioned where the old topper was.
We found that moving one side of the fabric about 1 foot, then the other side, etc. worked very well.
- While firmly holding the roll bar, remove the pin, and slowly allow the roll spring to take up the slack in the fabric.
We found the easiest way for us to do this was to get on the roof of the RV, and with one on each end of the fabric holding it taught to the roll bar, I removed the retaining pins, and we slowly let the roll spring wind up the fabric.
- If necessary, move the fabric in the awning slot to align the fabric to the roll bar slot. Once set, replace the retaining screws in the awning rail.
- If you removed the anti-billow lever, reinstall it.
We replaced the bedroom slide first. It took about 1.5 hours as we learned how to do this. The other toppers took only about 45 minutes each. The PICS below show how the job was done. Click each one for a larger version.


